


I have had this small tin of crab meat in my pantry for (mumble, mumble) quite some time now. I really did not know what I was going to use it for.
I think it was originally destined for a party, hanging out with other Swedish sandwich cake ingredients, but things did not work out between them, and so the crab meat, was left on the shelf… literally!

Inspiration hit me one night when the Moth aka hubby and I were on our own, no family to cook for and decided on a light meal to end the week. Surfing the net always provides inspiration and along the way I found a recipe for Hot Crab Dip.
As one always does, there were adjustments I just had to make, serving it cold, and adding some extra vegetables for crunch. As I like fresh and crunchy celery, cucumber and capsicum, I chopped these up and added them in. The dish has some added Vitamin C and fibre this way.
But credit goes to Will Cook for Smiles for the essence of the recipe. She baked hers in the oven, whilst I often prefer my seafood cold, so I didn’t. It is totally agreeable either way.
It is just your own preference.
Here is what I mixed to make this superb light meal/appetizer/dip/wine & cheese accompaniment.
Optional Extras if serving it cold:
Mix all ingredients together. Serve with crackers, fresh bread or baguette.
To Serve Crab Dip Hot:
It was hard to stop nibbling this more-ish mix with my water crackers!
Next time I’s serve it hot with some fresh salad and a secondary dish.
Enjoy.


We’ve had a family member’s kayak on loan for a while, but rarely taken it out because you know, life is mostly busy. There is always places to go, people to see, things to do, so kayaking was left on the back burner.
Finally a day arrives when we are free and the weather conditions are not right. I am too old to be paddling a kayak in gusty winds, where endurance and stamina are fundamentally necessary to get you back to shore! I don’t want the helicopter search and rescue to have to save me!
Last week, the weather was excellent.
Early morning, we loaded the kayak on the roof racks, with some difficulty and set off to Kayak on Lake Kurwongbah, in nearby Kallangur!

Lake Kurwongbah is a freshwater lake that supplies water to the Northern suburbs of Greater Brisbane. It was initially constructed to supply water to a paper mill in the 1950s.
Water skiing and paddle craft are permitted on the lake. Fishing, although restricted to paddle craft was introduced several years ago as part of the program to reduce a resident population of Tilapia, an introduced noxious pest fish that is considered detrimental to our native fisheries.
Close to the shores of the lake, the presence of Waterweed and Water Lillies meant my paddle frequently got entangled around my paddle so I wondered whether this indicated there might be a nutrient run-off issue into the lake; fertiliser perhaps from surrounding suburban areas?
The naming of Lake Kurwongbah was the subject of a newspaper competition in 1958. The winning entry was Kurwongbah which is the Indigenous name for Sideling Creek; Kurwongbah means “black duck”.
http://prfma.com.au/lakes/lake-kurwongbah/
The area is very popular on weekends and holidays as a picnic spot. There are shelters and electric barbecues. Parking is limited within the grounds, but there are plenty of extra spots on the main roads accessing the area.

Since 2008, Lake Kurwongbah has been stocked with native fish and the following species might be found there:
• Australian Bass
• Yellow Belly (Golden Perch)
• Mary River Cod
• Snub Nose Gar
• Saratoga
Redclaw yabbies have been introduced and are not native to the area and should not be re-released if caught.
I may be getting too old to hoist the kayak on the SUV roof racks but the promise of Redclaw is tempting. Red Claw are a bit like a large prawn or scampi in flavour. This makes me want to get a crab pot and see if I can snag some!
Until next time, have a wonderful week.

Quintessentially Aussie – ANZAC Biscuits
Merle is an Aussie Grandma and a fantastic cook who released a book of Australian recipes, and one of the all-time favourites is reproduced here albeit with a few alterations.
The recipe is posted here, as it was Anzac Day, yesterday.
Every year on 25 April, Australians remember the Anzacs in memorial services in every suburb, in every city in Australia, and it is a national holiday. I would venture to say a sacred day in the consciousness of all Australians.
Anzac biscuits are named after the Australian and New Zealand Army troops who fought on the side of Britain during WWI. They were unfortunately slaughtered in an mistaken decision made by the British command.
Churchills error in the Dardenelles against the Turkish forces resulted in an atrocious loss of life and the soldiers who fought there have since achieved saint-like status in the minds of Australians and Kiwis.
These biscuits/cookies keep well for an extended period of time and were sent in tins to the troops fighting in the filthy trenches at Lone Pine and Anzac Cove in Turkey, by the mothers and sweethearts of those brave young men.
Mel Gibson immortalised the Anzac soldier’s spirit in the 1981 film “Gallipoli”.

I cooked the Anzacs at 180 degrees C… sorry Merle love, my oven is happier working at a higher temperature than yours.
Feel free to post what temperature worked for you, if you try the recipe…
Preheat Oven 170 Celsius
Method
1. Sift flour, ginger in a mixing bowl and add coconuts, oats and sugar. Make a well in the centre
2. Stir in Golden syrup, boiling water and bicarb in a small bowl until combined. Add to the dry ingredients, along with the melted butter. Mix well
3. Take heaped teaspoons of mix and roll into small balls. Place on trays and flatten gently. Bake 6-7 minutes ( I baked them for 10 mins)
4. Cool on tray 10 mins til they firm up slightly.
The supreme sacrifice of those men in the cause of freedom, is truly something to eternally ponder about. “Lest we Forget”
Now you can also try these biscuits, and tell me what you think.
Reproduced here for the Danish island school and the children who some years back organized an Australian morning tea as part of their tuition from their fabulous teach who unfortunately passed away some years ago.
RIP Teacher Andrea.

Never buy a packet cookie or cake mix again! Many of them are just flour, sugar and dehydrated egg or fat.
You can easily make good quality cake mixes on your own in a food processor, or by hand, if you relish manually rubbing in butter to flour; (I don’t). But it does save you money and assist in building a zero waste household!

Buying larger bags of flour and sugar, in order to make up a few batches of cake mix will save money in the long run, as you can access cheaper prices for buying in bulk. Think how much each individual box of cake mix costs. I estimate you could save at least 2/3 of the retail price. So in effect, 3 for the price of 1!
These pre-made mixes can be made up immediately they’re removed from the fridge, but it will take a little longer than if the ingredients are at room temperature when you make them up. Use this time well by preparing pans, trays etc. whilst waiting for the mix to acclimatize.

*NB: Self raising flour is the equivalent of 1 cup of plain or all purpose flour mixed with 2 teaspoons of Baking powder sifted and mixed thoroughly.

Add 2 teaspoons grated orange rind with the water and eggs and omit vanilla.
Top cake with Orange glace icing when cold.
Dissolve 1 tablespoon instant coffee with 1/4 cup boiling water, and make up to 1/2 cup with cold water but leave to cool before using. Use this in place of the 1/2 cup water in original recipe.
Top with glace icing of your choice, or coffee icing.
Sift 1/3 cup Cocoa into a small basin, gradually blend in 2/3 cup water, stir till smooth. Use in place of water in original recipe. (The extra water is needed in this recipe to absorb the cocoa.)
Top with chocolate icing.
Cooking times vary so here is a guide to tin sizes and cooking times:
20 cm (8 inch) ring tin – 35 minutes
2 x 25 x 8 cm (10 in x 3 in) bar tins – 30 minutes
20 x 10 cm (8in x 4 in) loaf tin – 50 minutes
23 x 12 cm (9in x 5 in) loaf tin – 50 minutes
25 x 15 cm (10in x 6 in) – 45 minutes
Orange Glace Icing: Use 2 tablespoons strained orange juice in place of milk and omit vanilla.
Coffee Icing: Sift 2 teaspoons instant coffee powder with icing sugar.
If granular instant coffee is used, heat the milk and dissolve the coffee in the milk.
Chocolate Glace Icing: Sift 2 tablespoons cocoa with the icing sugar.
You will need about 2-3 tablespoons milk to bring mixture to a paste-like consistency.
Makes 20 cookies / aka biscuits

If you are planning a fund raiser, making the mix beforehand and bake without lengthy preparation on the day of sale.
No doubt about it, freshly baked home baked treasts will sell like hot cakes!!

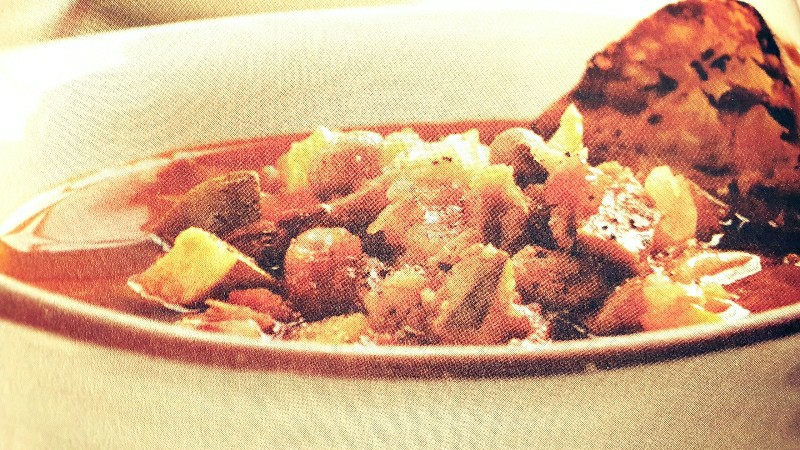
The beauty of this soup is that it works with most leftover vegetables. I chop up things I find in the fridge at the Home by the Sea, such as the leftover broccoli stalks or slightly limp-few days old -beans and add them in. The soup will taste just as good, if not better.
The addition of chickpeas adds a lot of fibre to this recipe and balances out the carbs hidden in the pancetta/bacon.
A hearty soup perfect for an easy family dinner.

I didn’t have a can of chopped Roma Tomatoes, in the pantry, so I boiled up 8 fresh Roma tomatoes, chopped them roughly, then boiling them in a saucepan till soft, [about 8 -10 minutes on medium heat].
Serves 6
If you are a soup lover, you might also like Lemon Broccoli Soup


Salmon is low in fat and high in protein. Not to mention it is a good source of B12, potassium, iron and vitamin D. No wonder the Scandinavians enjoy it.
Making pastry can be a pain but it’s a breeze with this recipe as the kitchen food processor blends and forms a delicious, cheesy pastry shell.
Cooks Notes:

Preheat Oven to 180 C (350F)
Delicious served hot or cold the next day with a green salad.
Meet Fred the Frog. He is a Green Tree Frog.

Fred and a few of his friends and family have been renting out space in our backyard.
They are very welcome although the dogs are not happy they are our tenants at the Home by the Sea.
The frogs try to get the favourite spot on the edge of the potplant as this helps them catch the moths that frequent our lawn at night, as modelled here by Esmeralda.

These frogs have an ability to change the colour of their skin according to the surface they are sitting on. Sometimes bright green, othertimes brown.
Their skin also emits secretions should they be eaten by a predator. The secretions in the skin taste awful and make a predator, such as a dog vomit, and suffer depression for up to 60 minutes.

Of course, the dogs had to test the theory. The new puppy couldn’t resist picking the frog up in its mouth. As well as the protective secretions, frogs have another defence. They scream, they wail. It is a sound that brings us running to rescue them. But we don’t touch them!
Human TOUCH can burn a frog’s skin if we pick it up with dry hands.
WET YOUR HANDS WHEN HANDLING A FROG.
[And do not touch toads without gloves. They are toxic!]
The vomit has been cleaned up and the depression lasted for a hour. A textbook example of the frog’s skin secretions at work, protecting it from being eaten by predators.
Here is a list of the frogs found in our area. At present we have around 8 -10 in our yard. The recent rains have delighted them.
| 1. | Limnodynastes peronii : Brown-striped Frog | 6 |
| 2. | Limnodynastes terraereginae : Northern Banjo Frog | 1 |
| 3. | Litoria caerulea : Green Tree Frog | 4 |
| 4. | Litoria fallax : Eastern Dwarf Tree Frog | 3 |
| 5. | Litoria gracilenta : Dainty Green Tree Frog | 4 |
| 6. | Platyplectrum ornatum : Ornate Burrowing Frog | 2 |
| 7. | Pseudophryne major : Large Toadlet | 4 |
| 8. | Rhinella marina : Cane Toad | 5 |


One of every three bites of food we eat is derived from plants pollinated by bees. And bees are in trouble worldwide.

As pollinators, bees along with other insects play an essential role for our gardens and plants, fertilizing plants so they may begin producing fruit and seeds. Bees are very important because:

Pesticides, parasites and climate change are diminishing bee populations worldwide and we can help them.
How?

We can help them with organic gardening practices, planting flowers to attract them and provide them with shelter, so at the Home by the Sea is opening a Bee Hotel.


The Pavlova recipe I make is an old recipe taken from my trusty Aussie Women’s Weekly Recipe book. *(Page 32 is a tomato veal dish, Peggy!)
This book that was gifted to me in 1979, by my Mother. 41 years later, with its spine tatted and broken, this book continues to reveal recipe secrets I have yet to make.

Following is the recipe I use, although I don’t use a piping bag to make the edges.
I just dump the meringue mix on to a lined baking sheet and form it into a makeshift circle, by dragging around the edges from base to tip with a broad spatula. It is less fuss, and noone wants too much fuss in the kitchen, when the mercury soars in summertime!

I cook my Pavlova in an oven set on 150 degees C. (300 degrees F.) for around 35 – 40 minutes. Then I will leave the pavlova to cool in the oven.
Once the Pavlova has finished its cooking time, I turn the oven off, and place a wooden spoon in the door to allow some heat to escape, but not all the heat, at once. This extended minimal heat is enough to dry the outer shell of the Pavlova whilst allowing the middle to be all soft and gooey.
It ends up quite rustic looking but leaves a crater or depression in the top into which you can place your fruits, custard or cream, or all three.

This year I decided to make something a little different. Impressive isn’t it? And it is quite simple.

Do you want to know how to make the Chocolate dome for the top?
Find the directions for this variation at my other blog – Something to Ponder About


You must be logged in to post a comment.