

As I get a little older, watching the waistline becomes mandatory. Weekends are more the time to indulge in baking and eating sweet treats. Rabbit rations are for the working week.
I was reminded of the wonderful ‘Hjonabandsaela’ or Blessing of the Marriage cake at a recent lunch! It is not only light and delicious, it is traditional comfort food at its best, and – it originates from Iceland!
And I am heading to a Thai wedding shortly. It’s an informal second wedding so a Bring a Plate concept is included. So to add some ‘Scandi flair,’ for which I am renowned. I will make an Icelandic cake.
Icelandic Wedding Traditions
Fridays are the traditional wedding day in Iceland.
The pagan Icelanders believed the day was dedicated to Frigga, who just happened to be the goddess of marriage! Engagements sometimes last for 3 -4 years, so after waiting that long, it is little wonder that cake features prominently in the celebrations!
At the wedding feast itself, a ‘Kransekake’ or traditional Scandinavian wedding cake, is eaten. This the wonderfully Scandinavian stack of crispy, concentric almond-based pastry rings, decorated with icing and flags, which looks and tastes incredible.
Another Icelandic tradition is for a groom to send presents to bride’s family, on the morning after the wedding. Whilst the ancient tradition is by and large, forgotten in modern times, it is still customary for a bride and groom to exchange personal “bed gifts and cake.” The traditional religious ritual, the ‘Blessing of the Marriage’ is undertaken by the priest, after the wedding couple leave the wedding feast, when the bride and groom are finally alone! This is the cake for such an occasion!!!
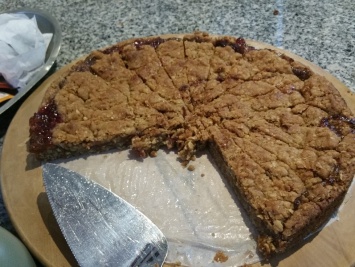
This weekend’s sweet treat!
Recipe – Hjonabandsæla -Blessing of the Marriage

Ingredients:
1 cup rolled oats
1 cup plain flour
1 cup dark brown sugar
150 gram butter
1 teaspoon bicarbonate of soda/baking powder
1/2 teaspoon cardamon (optional)
Rhubarb jam or other not very sweet jam such as cranberry.
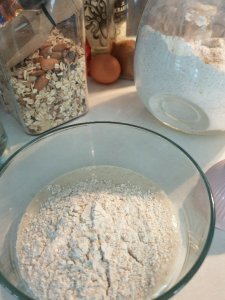
Mix thoroughly softened (not melted) butter with the sugar. Add flour, bicarbonate of soda and oats
Press 3/4 of dough into greased tin. Spread jam on top, sprinkle the rest of the dough on top.
Bake in medium hot oven approx 30 -40 minutes.
To Make your own Jam
Bring to boil:
2 cups chopped rhubarb
juice of 1 orange
1/2 cup strawberry or cranberry (lingonberry) jam
2 tablespoon sugar
Cook 10 minutes and allow to cool. You can add more sugar if you think it is too tart.
NB Tips:
- If mixing by hand, use quick cook rolled oats, instead of whole oats.
- Instead of rhubarb jam, you can try cranberry, blackberry or plum jam.


You must be logged in to post a comment.